Posts Tagged ‘bread’
Sourdough evangelism

sourdough bread
We kicked up a sourdough starter a couple of years ago and have managed to keep it alive through some skill and a bit of reliance on the biology of bacterial and yeast cultures. It took some CPR after this year’s summer vacation to bring it back from the brink of death, but we pulled it off and now it’s as vital as ever.
Lots of people want to make sourdough bread, but run into two basic problems. One, initiating a starter can be hit or mess. A new starter always goes through a ‘stinky’ phase, where the flour/water mush smells like vomit, a landfill, or even worse. If you’re lucky, it turns the corner (aka your bacterial culture wipes out the bad stuff). If not, you start over. Much easier is to get a bit of a friend’s starter, which is a service I’ve now provided many, many times, with mixed results.
This leads to the second problem: once you have a bit of starter, what do you do to keep it happy and actually make bread? There are myriad cookbooks and Web pages out there with all kinds of advice, but to my mind, many of them overcomplicate the process and sort of ignore the basic and elegant biology of a viable sourdough starter. Rather than pass on my hard-won wisdom piecemeal, I thought I’d take a few moments to record the process.
A prefatory note: this process should be fun. Much like homebrewing, the mantra of which is Papazian’s “relax, don’t worry, have a homebrew,” breadbaking is about making bread. The stakes here are low. After all, the main ingredients are flour, water, and salt, not exactly truffles and saffron on the financial scale. If you botch some bread, feed it to the ducks, use it as a doorstop, etc. If your starter dies, do not weep. Just chuck it and start again.
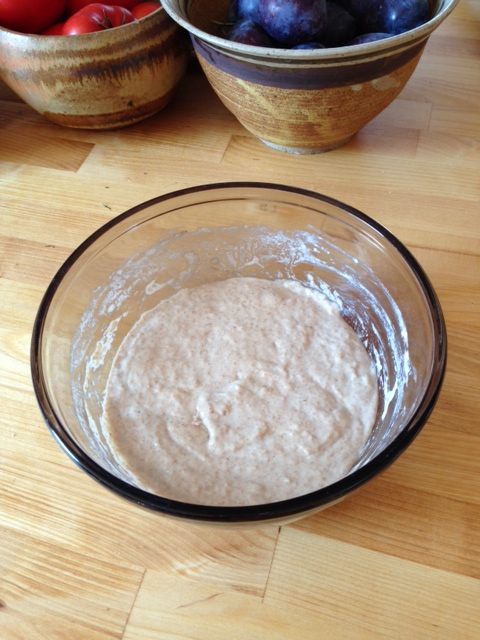
starter not yet bubbly
If you get some sourdough starter from me, you likely got it in one of two forms: dried flakes or about a quarter cup of starter in all its sticky and sour glory. Here’s what to do with both:
Flakes – Do this within a week of getting them from me. They supposedly have a fairly long shelf life, but why wait? Dump the flakes in a medium-sized glass, ceramic, porcelain, or stoneware bowl. Plastic is fine, too, but not optimal. Put in about a tablespoon of flour–rye, AP, or whole wheat are all fine, preferably organic–and then enough water to make the flour and flakes into a paste about the consistency of oatmeal. Cover the bowl with a cloth and leave it on the counter. Within a day or day and a half (ambient temperature and humidity matter), it should begin bubbling a bit. If not, wait another day. Once it bubbles, feed it daily, doubling its bulk, more or less, with each feeding. Once you’ve got a couple of cups worth of starter, you’re in business.
Starter – Do this within a day or two of getting it from me, and until you can do this keep the baggie in the fridge. Scrape the goo out of the bag with a spoon into a bowl as described above and feed it a few tablespoons of flour and enough water to maintain about the same consistency. It should start bubbling within 6-8 hours at most, depending on conditions. Simply feed daily as above, bulking it up.
When you have a starter on the counter for days on end like this, it’s normal for it to form a dry skin on top between feedings. Just stir it in during the next feeding. Feed every day, or at least every other day, and the skin will not be a problem. I suppose one could avoid this by using a plastic lid or plastic wrap instead of a cloth, but I like the cloth since it breathes and lets a bit of the starter aroma into the air. It’s a pleasant sour smell.
Once you’ve got enough starter with which to bake (about 300 g for a kilo loaf, or about half a cup), leaving about a couple of cups to continue the starter, you’re ready to bake. There are myriad recipes out there, but I can describe here my go-to loaf and then you can riff on that process with just about recipe. The loaf I make takes 1000g of ingredients: 300g of starter, 300g AP flour, 100g WW flour, 300g water, some salt, and sometimes flaxseed, sunflower seeds, etc. If your starter is warm and active–i.e.-it’s been sitting on the counter bubbling away–you’re ready to use it. Make your dough, let it rise (sourdough is slower than yeast, but oh so superior in every way), and bake as you would pretty much any yeast bread.
I strongly recommend getting a kitchen scale to do this by weight rather than measurements. Starter is stickier than most known substances, so the thought of having to measure it in a cup fills me with dread. Besides, if you put a stainless steel baking bowl on a scale and zero it, you can weight out the ingredients in about a minute, no muss, no fuss.
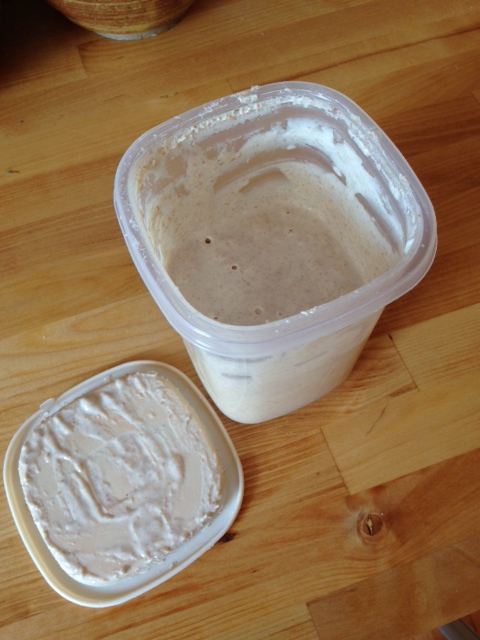
starter storage
So know you’ve got bread rising and are about to enjoy the fruits of your labour. What to do with the rest of the bowl of starter? I put mine in an airtight plastic container, feed it a wee bit (maybe a teaspoon and enough water to keep the consistency), and then put it in the fridge. I know from experience this will last in the fridge in this state for at least three weeks. Beyond that, you can ostensibly freeze it, although to be honest that hasn’t worked well for me in the past. Sometimes if the starter is overly excited–who knows, maybe the yeast are having a party–it will pop the lid, but this is rare, and if you use a large enough container, not a big deal.
Next time you want to bake, take this out of the fridge, scoop out enough to make a sufficient ‘production’ starter batch. For the example above, this is would be at least 300g, so I’ll put about 150-200g or so (I eyeball this, really) in a glass or ceramic bowl, feed it with flour and water until there’s about 400g in the bowl. It sits for 6-8 hours (sometimes more, sometimes less) on the counter until it is bubbly and airy, then I bake. Overnight is fine, too. Measure out what you need, and put the remainder back with the “mother” culture in the fridge, stirring this ‘new’ starter in well to mix it up. I typically toss in some flour when doing this to feed the whole mass.
I’ve probably left out all sorts of details, so if anyone has questions, please ask them below and I’ll improve these instructions accordingly.
Happy baking!


